The content of the article
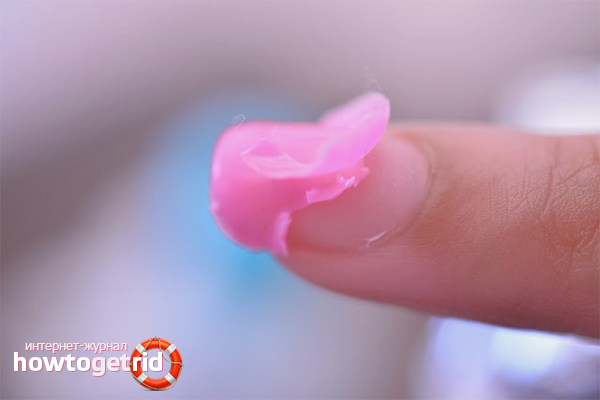
A high-quality coating lasts longer than 2 weeks on the nails, so removing it is not so easy. Shellac removal refers to salon procedures, a qualified master will cope with the task in a short time, observing the technology. But what about girls who do not have the opportunity to visit the salon? That's right, resort to removing shellac at home. The duration of the procedure ranges from 40 to 60 minutes, depending on the method chosen.
Ways to remove shellac at home
- Acetone-based varnish remover.
- Acetone without impurities.
- Professional gel polish remover.
Precautionary measures
- It is important to understand that the chemicals used to remove the coating are extremely aggressive. In addition to damaging the nail plate, they also injure the skin of the hands. If the technology is not followed, burns, allergies, and inflammatory processes may appear. In such cases, you should immediately abandon the independent procedure, and then contact a qualified master. After successful removal of the coating, it is imperative to carry out “resuscitation” of dull, brittle and exfoliating nails. As for the special fluid (remover) for removing gel polishes, it is harmless and created specifically for these purposes.
- It is strictly forbidden to tear off shellac by any means, including using manicure forceps or scissors. You can not cut off the coating, such actions entail disastrous consequences. Also, do not press hard on the nail so as not to damage it.
- Choose a well-ventilated room as a room for shellac removal. Do not carry out the procedure in the bathroom or bedroom, at this time do not let children or pets in your house. Substances with which the coating is removed, volatile and toxic. If possible, purchase a disposable respirator for this purpose.
- Before the procedure, you need to thoroughly wash your hands with laundry soap and treat them with an antiseptic. Do not proceed to remove the gel polish until the nails are completely dry. It usually takes 15 to 30 minutes to evaporate moisture. Such a step should be taken in order to exclude the possibility of infection of the skin or nail plate, if something goes wrong.
- All tools used to remove shellac should be made of plastic, glass or wood. Instruments made of metal can react with chemicals.
How to remove shellac with nail polish remover
Necessary materials:cosmetic tampons; electrical tape or tape; nutritious cream; cuticle oil; nail polish remover with acetone; stick or spatula for manicure; foil.
- Prepare your hands for the procedure, wash and dry thoroughly. Treat with an antiseptic.
- Cut cosmetic swabs into 2 or 4 parts, depending on the original size. You can use cotton pads or regular cotton wool, in this case you need to cut pieces matching the size of the nails.
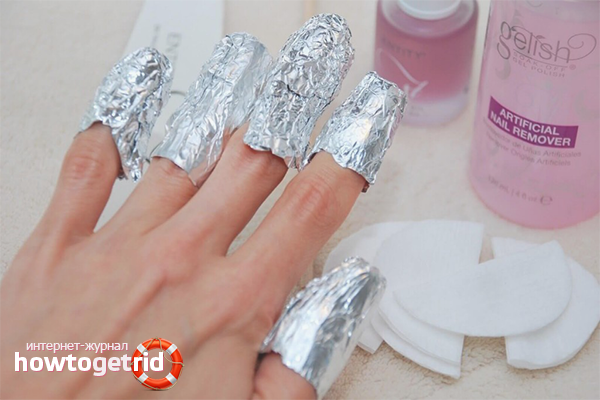
- Expand the foil and cut it into rectangles 10 * 10 cm in size. This should be enough to wrap your finger, and then fix the foil.
- Treat the skin around the nails with a rich cream to protect it in case of contact with chemicals.
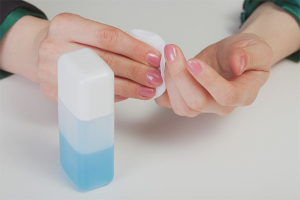
- Moisten a cosmetic swab or cotton pad liberally with nail polish remover; do not wring. Put the compress on the nail, being careful not to get on the skin. Fix with foil, wrap with electrical tape on top so that air does not enter. Perform simple manipulations with the rest of the nails.
- Wait a quarter of an hour, then begin to massage the foil and cotton wool, helping the shellac to move away. Wait another 10 minutes.
- After the time has passed, remove the compresses from all fingers, carefully remove those parts of the coating that are free to leave. Do not push and do not try to tear off what does not tear off.
- Dampen cosmetic swabs again in nail polish remover, put them on your fingers, fix with foil and electrical tape. Wait 15 minutes again, then massage the compress.
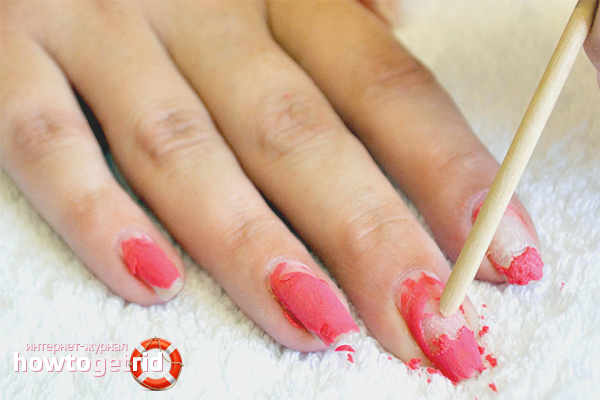
- After the second stage, shellac will depart without difficulty. Remove all compresses one at a time, soak a cotton pad in acetone and wipe each finger. Then remove the remains with an orange stick, then wipe again. Repeat until you are satisfied with the result.
Important!
Remove foil and cosmetic swabs in order of priority, otherwise shellac will harden again when exposed to air. Begin processing with the little finger, gradually moving to the other fingers.
Shellac Removal with Acetone
One of the most extreme ways to remove coating.
Necessary materials:pure acetone; olive oil; fat cream; cotton pads; glass container.
- Sanitize your hands. Handle your fingers well with olive oil, rubbing it both in the skin and in the plate itself. Wait 10 minutes for the composition to soak, remove it with a tissue and repeat the procedure.
- Apply a rich nourishing cream (suitable for children or anti-frost) to the skin around the nails with a thickness of about 2 mm. This is necessary in order to minimize the harmful effects of chemistry on the skin.
- Pour so much acetone into the container so that it covers all the nails. Dip your fingers in a bowl, wait 20 minutes.
- After the expiration date, remove shellac with a dry cotton pad. If the coating does not move well, dip your fingers in the bath for another 5 minutes. After that, wipe your nails again and remove the remains with an orange stick.
Important!
If you feel even the slightest inconvenience under the nails or on the skin, immediately pull out your fingers and wash them thoroughly with soap. Ladies who regularly make shellac, but remove it at home, should immediately refuse this method. Regular exposure to acetone exacerbates the condition of nails and fingers in general.
How to remove shellac using a professional kit
The kit is sold in specialized cosmetics stores for nail service masters. In it you will find all the necessary materials to remove the coating. A set costs about 900 rubles. Harmful effects on the nail plate and skin are completely eliminated, the product contains natural oils, esters and glycerin.
Materials included:professional remover for removing gel polish; stylus, spatula, orange sticks (one device replaces another); finger covers.
- Wash your hands thoroughly, treat them with an antiseptic or regular vodka. Dry the nail plate naturally for 20 minutes.
- On professional finger covers you will find attached sponges. Dampen them liberally with gel polish remover (remover).
- Put special “pockets” on the fingers so that the moistened sponge is located on the nail plate. Securely fasten with appropriate Velcro on the covers. Try not to process two hands at once, so that the quality does not suffer, and it was convenient for you to carry out the procedure.
- Carefully read the instructions, find the graph with the exposure time, each manufacturer has its own. As a rule, the duration of action varies from 10 to 15 minutes.
- After the expiration of the period, remove the cover from one finger and evaluate the result. Shellac should move freely. To check this, pry off the cover with a stylus. Otherwise, put the pocket on your finger again and wait another 5-10 minutes.
- Now remove the covers one at a time, starting with the little finger.After that, remove the remaining shellac with an orange stick, dampen a cotton pad in the remover and wipe the nail plate. Repeat the manipulations with each nail, and then go to the second hand.
- If the master turned out to be in good faith, as a result of which the coating does not come off so easily, pry it a little with a stylus, then put on the cover moistened with liquid again. Continue the procedure until you achieve the desired effect.
Have you decided to remove shellac yourself? To get started, select the appropriate method. As for acetone, it can be replaced with isopropyl alcohol, the technology is preserved. After removing the gel polish, coat your nails several times daily with the Smart Enamel remover sold in the pharmacy. In the evenings, rub camphor, olive or almond oil into the plate.
Video: how to remove and apply shellac

Submit